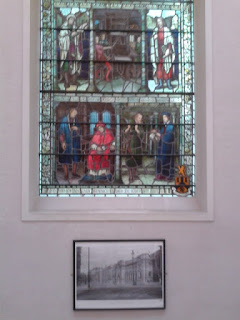
Book stain glass window
For this project I had made a book worm book with the front cover as the stain glass from the Plymouth City library. What I had done to make this was use some paper straws from Lawsons for the frame (the outline of the window) and some colored tissue paper to fill in the parts of the book where the glass was. How I did this was by tissue papering the book black then sticking the paper straws on afterwards then later painting the book black. The reason for this was so that the book would look bold and would go along with some of the other hard black books in the library. During the lesson on Thursday I was well underway of finishing the front cover of the book, the stain glass was colored tissue paper I thought that by using the colored tissue paper it would stand out against the black back coat of the book. My original plan was to paint the characters on the colored tissue paper, but little did I know that Tweeney was watching my every move during this process. Tweeney suggested that I'd use some of the film reel to cover up the blue areas I had made. She said that if you held them up to the light the picture would show through. This gave me an idea of how to create the book cover, So I stuck the film reel on the Blue stain glass using a glue gun (suggested by Lauren) and this improved the books appearance. I did this because I felt like the Blue shown through the film reel effectively. It also gave it a slight sheen to the cover. It was late Thursday afternoon and I was still adding the extra bits on the book, Tweeney had just given us some extra time to give us gangway to give us more time to finish off our books ready for Friday afternoon. I had written down my ideas in my book and I had an idea of making the library reception light on my book cover. So to be more creative I overlapped the lights across an inch of the film reel to make the book look more homely. I had made the light shape from tin foil and painted over it in black stripes for the idents in the Reception lights. The tin foil acted well cause it made the book cover stand out more.
I had a couple minutes left over at the end to mark out where I was going to cut the hole in the back of my book. I wanted the hole to be very book worm like. Why I did this was because I wanted to create the position on the back cover of the hole.
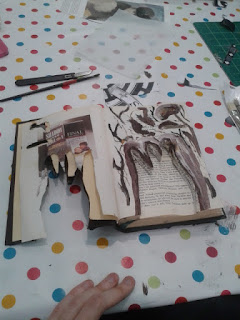
That Friday morning I was hard at work cutting the hole shape out of the back cover I did this by using the cutting mat along with the cal pol knife to carefully cut round the hole I had made. Here was the shape of the bite At first I had realized that the holes shape was explosive and big. Eventually I finished cutting the hole out, The next thing to do was to cut through the paper. I did this because I wanted to demonstrate how deep into books book worms could get. I started to cut through 3 pages of the book sticking to the shape of the hole I had cut out the back. I found this process hard due to the ripping of the pages when I cut round them, So I tried to cut through a chunk of the pages at a time. This process spend things up however there were lots of rips where I had made some Errors in my cutting.
It was then time to finish the final touches to our books and I had an idea of making the markings that book worms would leave behind in the front pages. I had painted the markings on first then I suggested to Lauren that I'd take my book outside with a lighter to burn onto the pages for the markings. This was difficult at first because the weather was very damp and wet and there was a great gale blowing in our direction causing the pages to flap around in the wind plus we couldn't get the lighter to light. So we tried using a candle to burn onto the pages, this worked better, Some of the wax dripped onto the pages I decided to leave the wax as I thought It brought around a certain horror feel to the book.


No comments:
Post a Comment